Showing posts with label breakfast. Show all posts

Friday, October 19, 2012

Gluten Free Bagels

I have wanted to make bagels from scratch ever since I saw them made on a Cooking show years ago. So I finally took the plunge when I saw a recipe for a pumpkin pie cream cheese I wanted to try. I found a recipe for gluten free bagels but I had to adapt it a bit to work with what I had on hand so here is what I did.

3 tablespoons dry milk powder
1/2 teaspoon salt
1 1/2 tablespoons plus 2 teaspoons granulated sugar
1/4 teaspoon cinnamon
2 1/4 teaspoons (1 packet) instant rise yeast
2 tablespoons butter, melted and cooled
1 egg, at room temperature
2 egg whites, at room temperature, yokes reserved
1/2 cup warm water (110 degrees), plus 1 teaspoon water
1/2 cup Masa Harina Flour (also called corn flour, or corn masa NOT corn starch) 
Nonstick cooking spray
  1. Preheat the oven to 200 degrees. When the oven reaches that temperature, turn it off.
  2. Place the flour mixture, milk powder, salt, 1 1/2 tablespoons of sugar, cinnamon, and yeast in a medium mixing bowl. With the mixer on low, blend the ingredients.
  3. Add the butter, egg, and two egg whites to the dry mixture. Whip on low speed until blended.
  4. Add the water. Beat for 3 1/2 minutes. Then work in masa flour by hand.
  5. Remove the dough from the mixing bowl and divide it into 8 balls.
  6. Roll each ball into a 7-inch rope and then connect the ends of the rope to form a circle, sealing the ends securely.
  7. Lightly grease a baking sheet with corn or olive oil. Place each bagel on the baking sheet. Cover the bagels with wax paper that has been lightly oiled.
  8. Set the baking sheet in the oven for 40 minutes to allow the dough to rise. (It won’t double in bulk.)

    Remove the baking sheet from the oven and preheat the oven to 400 degrees.
  9. Fill a large saucepan with water (about 4 inches deep) and add the remaining 2 teaspoons of sugar. Bring the water to a boil.
  10. Place 4 bagels at a time in the boiling water and boil for 1 minute, turning each bagel over after 30 seconds.
  11. Cover the baking sheet with parchment paper and spray the paper lightly with cooking spray. (The bagels tend to brown too much on the bottom without the paper.)
  12. Remove the bagels from the water with a slotted spoon and lay them on the paper.
  13. Repeat Steps 11 and 13 with the remaining 4 bagels.
  14. In a small bowl, whip the remaining egg white with 1 teaspoon of water until frothy. Brush the mixture on top of the bagels. If desired, sprinkle tops with cinnamon sugar or sesame seeds.
  15. Bake the bagels for 20 minutes.

Saturday, September 29, 2012

Gluten Free Apple Cider Doughnuts

Apple Cider Doughnuts
 
I converted the above recipe to Gluten free and I am thrilled with how they turned out.

granulated sugar for preparing pans
1 1/2 cups Gluten free all-purpose baking flour
1/2 cup soy flour (can just use GF all purpose but the soy helps keep them from going stale as quickly)
1 1/2 teaspoons baking powder
1 1/2 teaspoons baking soda
1/2 teaspoon salt
2 teaspoons ground cinnamon
1 large egg, beaten
2/3 cup packed brown sugar
1/2 cup apple butter
1/3 cup pure maple syrup
1/3 cup apple cider
1/3 cup plain nonfat yogurt
3 Tablespoons vegetable or canola oil

Preheat oven to 400°F.
Grease pan and sprinkle with sugar.
Combine together flour, baking powder, baking soda, salt and cinnamon; set aside. In another bowl, whisk together egg, brown sugar, apple butter, maple syrup, cider, yogurt and oil. Add dry ingredients and stir just until moistened. spoon batter into cavities of the pan, don’t fill them to the top or your doughnuts will puff up and lose there holes still yummy but not quite the same. Bake 10 to 12 minutes, or until the tops spring back when touched lightly. turn out doughnuts to cool, Clean the pan, re-coat it with oil and sugar. Repeat with remaining batter. I got one and a half dozen from my pans.

you can glaze or frost or sprinkle with sugar or whatever you want. Enjoy!

Thursday, September 27, 2012

Gluten Free Crock Pot Apple Cobbler

I was looking for a quick and easy apple breakfast recipe and stumbled on this one Easy Breakfast Apple Cobbler from Food.com


So I decided to give it a shot. Only 5 ingredients, naturally gluten free, and I just set it and forget it and wake up to delicious hot apple breakfast. Sounds almost too good to be true.

I did modify mine slightly. 
I used white sugar rather than honey as I was apparently out, and added a handful of golden raisins.

Just be sure if you want it gluten free to use a gluten free granola. 

I would say to go with the honey over the sugar it caramelized and then started to burn a little. This might be a side effect of my crock pot which I think needs to be replaced and the low might not be cooking on low. I suspect this because the apples were a little bit more mush than a cobbler usually leaves them but that may be because I picked softer apples and you will want to be sure to use good sweet baking apples like Braeburn.

Tuesday, September 25, 2012

Gluten Free Fried Apple Pancakes

Carla Hall's Fried Apple Pancakes
 This recipe was another I found when looking for simple and yummy apple recipes. I like it because its easy to size up or down to suit your needs unlike a cake or pie. They make a great side dish, I served them with Swedish meatballs, or you can eat them on their own for breakfast or whenever. The original recipe, linked above, has an apple cider syrup to go with it but we prefered them with maple syrup or warm apple sauce.
1 Cup Gluten Free Bisquick Baking Mix
1 egg
1 cup of milk
1 tbs vegetable oil or melted butter
1 Teaspoon Pumpkin Pie Spice

3 Medium Apples
pealed, cored, and sliced into 1/4 in rings

Prepare the pancake batter with the baking mix, egg, milk, oil, and spices. Heat your griddle to a medium heat. Dip the apple rings into the batter and then place on the well greased griddle. Let cook through. You want the pancake batter not to burn while the apple softens so if you need to reduce the heat do so.

Friday, November 11, 2011

Pumpkin Bread

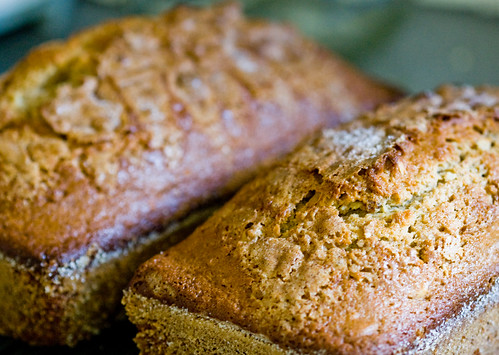
The Kids and I made pumpkin bread. LOTS of Pumpkin bread. Because we have LOTS of pumpkin.

We made both Normal and Gluten Free breads.


Pumpkin Bread
We actually doubled the recipe below when we made it:
3 cups pumpkin puree
1 1/2 cups vegetable oil
4 cups white sugar
6 eggs
4 3/4 cups all-purpose flour
1 1/2 teaspoons baking powder
1 1/2 teaspoons baking soda
1 1/2 teaspoons salt
5 1/2 teaspoons pumpkin pie spice

Preheat the oven to 350 degrees. Grease and flour three 9×5 inch loaf pans.
In a large bowl, mix together the pumpkin, oil, sugar, and eggs. Combine the flour, baking powder, baking soda, salt, and spices; stir into the pumpkin mixture until well blended. Divide the batter evenly between the prepared pans.
Bake for 45 minutes to 1 hour. The top of the loaf should spring back when lightly pressed.

Gluten Free Pumpkin Bread
1 1/2 cups of Bob’s Red Mill All-Purpose Gluten-Free Baking Flour
1 tsp. baking powder
1 tsp. baking soda
1 tsp. Xanthan Gum
1 tsp. cinnamon
1/2 tsp. all spice
1/2 tsp. nutmeg
1/2 cup (1 stick) unsalted butter, softened
1/2 brown sugar
1/2 granulated sugar
1 tsp. gluten-free vanilla extract
1 1/4 cup pumpkin puree
3 eggs

Preheat oven to 325 degrees. Line muffin tin cups with paper cupcake liners. In a medium bowl, combine all dry ingredients together and set aside. In a large bowl, using an electric mixer, beat the melted butter, sugars, eggs and pumpkin until smooth (the batter will be thick). Fill each liner 3/4 full with batter and bake until the top feels firm and a toothpick can be inserted in the center and comes out clean (about 25 minutes).

Wednesday, March 16, 2011

Lemon Blueberry Zebra Cake

Here is the original vanilla and chocolate recipe I found. Zebra Cake
Photo from original recipe at www.realepicurean.com

And here is what I did:

4 eggs
1 cup sugar

3 cups of flour
4 tsp of baking soda
1 cup oil

1 cup lemon lime soda
3/4 cup frozen blue berries (or 1/4 cup blueberry juice)
1/4 cup lemon juice


Mix eggs and sugar until creamy and smooth.

Mix flour and baking soda well.

Add Oil, flour mixture and lemon lime soda to egg mixture about 1/3 at a time mixing well with each addition.

divide in half and set aside.

Take frozen blueberries and microwave for about 1.5 min. Then pour into a bowl through a sive crushing berries to fully juice (or crush with a fork and strain out berry skins and things.)

Mix blueberry juice into one half of batter. add lemon juice to other half, mix quickly and well this will foam up a bit as the acid works on the baking soda.

Now to stripe it. In a well greased round cake pan (8in will work, 9 is better), take 3-4 tablespoons of one batter and poor directly into the middle of the pan. Then add 3-4 tablespoons of the other right in the middle of that. alternating until you have used all of the batter (great pictures of the process with the original recipe.) 

bake in a preheated oven at 325 degrees and start checking for doneness in about an hour.
Sliced for dipping. YUM!
 Now to be honest if we were not smothering it in chocolate this would not have been that good. The texture was great but the flavors just did not really come out all that much so I would stick with the chocolate vanilla version and add some whipped cream, berries, and a good cup of coffee. It was not all that sweet and so would make a great breakfast cake.
(We did have the leftover pieces for breakfast it was in fact good.)

Saturday, February 5, 2011

Breakfast for dinner

We had pancakes for dinner and there were a few cute ideas I had been waiting to try. They were really simple and fun. They were a hit in our household so I thought I would share them.

Pancake snowman. I made mine with blueberries rather than chocolate chips still very yummy (tip if adding fresh blue berries or chocolate chipes place on after cooking mine were frozen so I added during cooking but the effect was not as clear.
image and insparation sorce: www.ohdeedoh.com

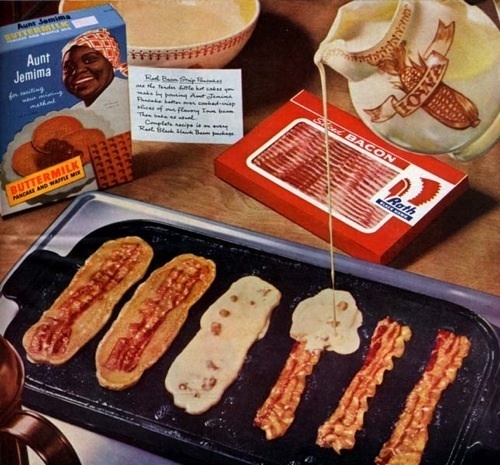
Bacon filled pancakes. these were fun, I think a thicker fluffier batter would make these mine was a bit thin, they were stull really good but I think it would look better with a fluffier pancake.

image and insparation sorce: chicagoist.com
Hope your family likes these ideas too!

Saturday, January 22, 2011

Quick Brunch Quiche


So I was craving one of Sarah's Zucchini Quiche but not really Zucchini and I had fussy kids who needed lunch NOW. 

So I took cressent rolls and draped and folded the triangles to pretty much cover the sides and bottom of  cup cake cups. The put that into a 350 degree preheated oven. (you will want to watch these when I made it the cooking time was just right for adding the eggs but if yours take longer you may need to take the cups out early you want the top edges to just brown a little but the bottom to still be the pale dough color.)

In a frying pan I sautéed about a tablespoon finly chopped onion. I used bacon drippings I had saved you could use butter or oil. While that was cooking to the trasparent stage I scrambled 4 eggs with milk and salt and pepper to taste (I used black pepper, and a mix of garlic salt and season all) then I chopped up a couple slices of ham lunch meat and added that to the pan. Give it a few good stirs you do not want it to "fry" just brown a little then add the eggs and cook to a well mixed scramble. As soon as they are cooked to firm but just a little wet still take them off the heat and spoon into the cressent dough cups pressing down then cover with shredded cheese. (I used a taco mix) put it back into the oven until the top of the dough is nicely brown and the cheese has melted.

serve warm (though I am sure these would be good cool none survived for me to find this out for sure)

Saturday, August 8, 2009

Amish Friendship Bread

So I was given a starter batch of Amish Friendship bread and instructions I was flabbergasted and flummoxed! The instructions looked like a bad chain letter. They included the insistence that the starter recipe was only known to the Amish and you had to pass the batter on or this wonderful bread would pass out of existence. The final bread recipe also included instant pudding? Well I don't know about you but I am sure the Amish did not use mysticism when they mixed flour, milk, sugar and yeast for the starter batter, nor do they use instant pudding in any fashion. So here is a Starter recipe if you want to make it (its great to have around as its a constant source of baking for you if you don't pass on all the starter batter and helps endear you to neighbors who are usually more than happy to receive free baked goods.)
So if you are given a starter batter from me or others here is what you do.
Day 1 - receive the starter (the recipe for the starter is below)
Day 2 - mix
Day 3 - mix
Day 4 - mix
Day 5 - Add 1 cup each flour, sugar and milk.
Day 6 - mix
Day 7 - mix
Day 8 - mix

Day 9 - mix
Day 10 - Add 1 cup flour, 1 cup sugar and 1 cup milk. Divide into 4 containers (gallon freezer bags are good for this), with 1 cup each for three of your friends and 1 cup for your own loaves. Give friends the instructions for Day 1 through Day 10 and the following recipe for baking the bread.

Amish Friendship Bread
2/3 cup oil
1/2 milk
3 eggs
1/2 tsp. salt
1 tsp. vanilla
1 to 1 1/2 tsp. cinnamon
1 cup sugar
2 cups flour
1 1/4 tsp. baking powder
1/2 tsp. baking soda

Mix ingredients well. You can add 1 cup raisins and 1 cup nuts (optional).
Grease two loaf pans with butter, sprinkle with sugar instead of flour.
Bake at 325 degrees F for 45 minutes to 1 hour (individual oven temperatures vary). Cool 10 minutes, remove from pans. Makes two loaves of Amish Friendship Bread. you can make it in single bunt pan if you happen to have lent your second bread pan to someone and so only have one on hand.

If you would like to start your own Friendship Bread you can do the following...
Amish Friendship Bread Starter
1 pkg. active dry yeast
1/4 cup warm water (110°F)
1 cup all-purpose flour
1 cup white sugar
1 cup warm milk (110°F)
1. In a small bowl, dissolve the yeast in warm water for about 10 minutes. Stir well.
2. In a 2 quart glass or plastic container, combine 1 cup sifted flour and 1 cup sugar. Mix thoroughly or the flour will get lumpy when you add the milk.
3. Slowly stir in warm milk and dissolved yeast mixture. Loosely cover the mixture with a lid or plastic wrap. The mixture will get bubbly. Consider this Day 1 of the cycle, or the day you receive the starter.
For the next 10 days handle starter according to the instructions above for Amish Friendship Bread.
Thanks for visiting!

Tuesday, July 14, 2009

Hands like Lady Macbeth

I bought a large amount (for our family) of cherries because The Girl wanted them, but they were not being eaten quickly and I needed to find a use for them before they went bad. So I decided to try a fruit coffee cake and went to find the recipe for Strawberry Rhubarb Coffee Cake a friend of mine posted to facebook. I did not have enough cherries for the filling so I added a can of cranberries what turned out much better than I expected and it added that tartness that the rhubarb would have in the original recipe.

The thing with cherries is that they have pits and stems which need to be removed, and cherry juice stains.

CHERRY CRANBERRY COFFEE CAKE
Filling:
1 cup sliced cherries
1/2 cup pureed cherries or berry baby food
1 can cranberry sauce
1 teaspoon cinnamon
mix ingredients well. heat over medium heat until it begins to boil then reduce heat to low and allow to simmer until thickened. (alternatively add a little water and 2T of cornstarch to thicken more quickly)
Cake:
1 1/2 cups of flour
3/4 cup of brown sugar (If you like cake a little less sweet, just use 1/2 a cup of sugar)
1/2 tsp. baking powder
1/4 tsp. baking soda
1/2 tsp. nutmeg and/or 1/2 tsp. cinnamon
1/4 butter or shortening, softened but not melted
1 egg
1/2 cup buttermilk (or substitute 1 T lemon juice plus enough regular milk to equal 1/2 cup)
1/2 tsp. vanilla (or more to taste)
Preheat oven to 350°F.
Combine dry ingredients in a medium bowl. Use a pastry blender or a fork to cut in the butter to a crumbly texture. Next, combine the egg, milk and vanilla in a separate bowl and then add to the dry ingredients. Mix gently, and only to combine the dry and liquid ingredients--the batter should still be lumpy.
Grease an 8x8 in. pan or a round pan of similar diameter. Spread half of the batter in the pan, then cover with the fruit mixture. Next, spoon the remaining batter over the fruit, in mounds like you would for a cobbler.

Topping:
1/4 cup flour
1/4 cup brown sugar
2 T butter
1/2 cup crushed nuts (optional)

Use a fork or pastry blender to cut in the butter to a crumbly texture. Mix quickly with nuts if including. Sprinkle evenly over pan. Bake for 40-45 minutes, or until golden and sugar topping is mostly melted. Serve warm at nap time with coffee and a good book.

(with significant credit to my friend Julie Binnie who gave significant credit to Better Homes and Gardens New Cookbook)

Thanks for visiting!